REVIEW · HONOLULU
Makapu’u Lighthouse Trail and Shuttle Service
Book on Viator →Operated by Kaimana Tours · Bookable on Viator
Whale season and a shoreline hike. This is a smart way to see Oahu’s southeast coast and the Makapu’u Lighthouse Trail without fighting traffic or rushing your walk. You’ll start with a round-trip shuttle from Waikiki, stop at Halona Blowhole for dramatic wave photos, then take a self-guided hike with big ocean views and winter whale-spotting potential.
Two things I like right away: the trail is fully paved (so you can keep a steady pace), and the included stops make the day feel “complete” at a very fair price—especially since national park fees and bottled water are part of the deal. On rides, guides like Tommy, Matthew Kenny, and Diogo tend to turn the drive into something more than just transportation.
One possible drawback: the hike is easy in format (paved), but it’s still an uphill climb, and access to the actual lighthouse area is restricted—you can’t go inside. If you’ve got knee or back issues, plan carefully and consider a more level option.
In This Review
- Key points before you go
- Waikiki to Makapu’u: the shuttle ride that makes the day easier
- Who the shuttle really helps
- Halona Blowhole stop: timing your photos and dealing with ocean drama
- A heads-up about weather
- Makapu’u Lighthouse Trail on foot: paved, scenic, and still a real climb
- What you can see from the trail
- The lighthouse itself: great photos, not a visit inside
- Whale-watching chances from the viewpoints (Nov–Apr)
- Best way to use whale watching here
- How long you’ll need: making the 4 hours feel unhurried
- Why the self-guided setup works here
- Guides and the small extras: why the price feels fair
- What to bring (and what to wear) for Makapu’u
- Who should book (and who should skip)
- Should you book the Makapu’u Lighthouse Trail and Shuttle Service?
- FAQ
- How much is the Makapu’u Lighthouse Trail and Shuttle Service?
- How long does the tour take?
- Is pickup included, and where does it start?
- What stops are included during the tour?
- Is the hike self-guided?
- Do I need to pay park fees?
- Can you enter the lighthouse?
Key points before you go
- Halona Blowhole is your first big wow moment, with spray and rock-edge views on the way to the trail
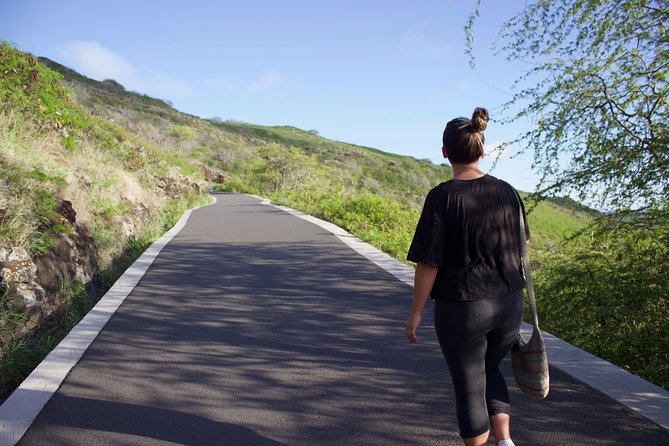
- 2.5-mile, paved route lets you hike at your own speed without scrambling or loose footing
- Winter humpback whales (Nov–Apr) are often seen from viewpoints along the coast
- Small groups, up to 14 travelers, make pickup feel more organized
- The lighthouse photo views are great, but you can’t enter the lighthouse
Waikiki to Makapu’u: the shuttle ride that makes the day easier
This experience is built around one simple advantage: you show up in Waikiki and let someone else handle the driving and the tricky timing of getting you to the trailhead area. The shuttle runs round-trip, and the drive along Oahu’s southeastern coastline is part of the appeal—think ocean and lookout views that set the tone before you even start walking.
I also like that the pickup setup is designed for convenience, not chaos. If you’re staying in Waikiki, you’ll be assigned a pickup location and you wait outside that spot. The driver has multiple stops, so you’re not always first on the route. Give yourself a small buffer—then you won’t feel stressed.
If you’re not staying in Waikiki, there’s a free parking option listed at 2805 Monsarrat Ave with a short walk to the Queen Kapiolani Hotel for shuttle pickup. In other words: it works whether you’re a hotel guest or using your own wheels.
You can also read our reviews of more tours and experiences in Honolulu.


Who the shuttle really helps
If you’d rather spend your energy on the hike (and photos) instead of parking and walking from a lot, the shuttle is the value. Several people note that parking can be a challenge, and that having a ride makes the whole outing less fussy.
Halona Blowhole stop: timing your photos and dealing with ocean drama
The itinerary starts with Halona Blowhole, and that’s a solid opener. Even if you’ve seen blowholes in other places, this one has a specific Hawaii feel: the coastline rocks, the ocean push, and that moment when spray rises where it shouldn’t, just because the wave gods are in charge.
Practically, this stop is great for photos because you’re not starting with a long climb. You’re standing near dramatic scenery first, with time to frame shots before you head to the main trail.
A good way to use this stop is to treat it like a warm-up. Take your wide shoreline photos, then look for the angle where the water hits the rock in the cleanest line. If you’re traveling with a camera, you’ll thank yourself later when you’re on the trail trying to balance walking and shooting.
A heads-up about weather
Oahu weather can change fast. One group experience included a tropical downpour during the hike, so it’s smart to assume the trail could get slick. Plan footwear you can trust on uneven small stones and possibly muddy patches.
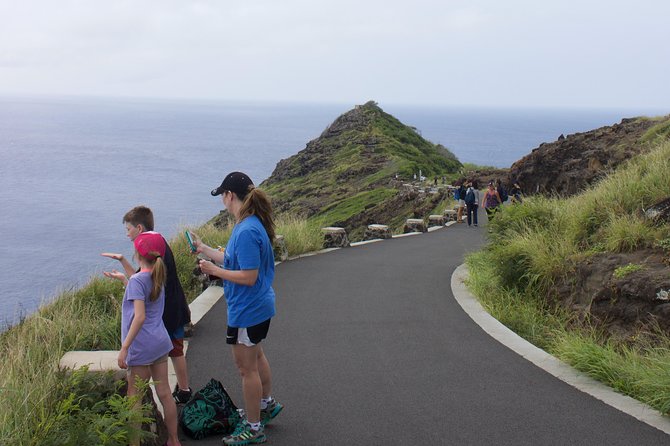
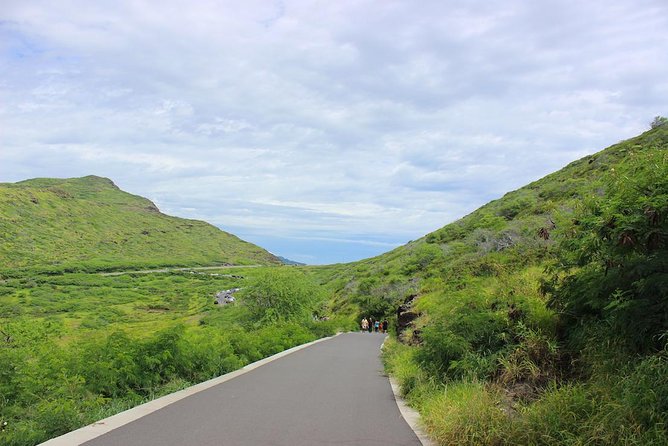
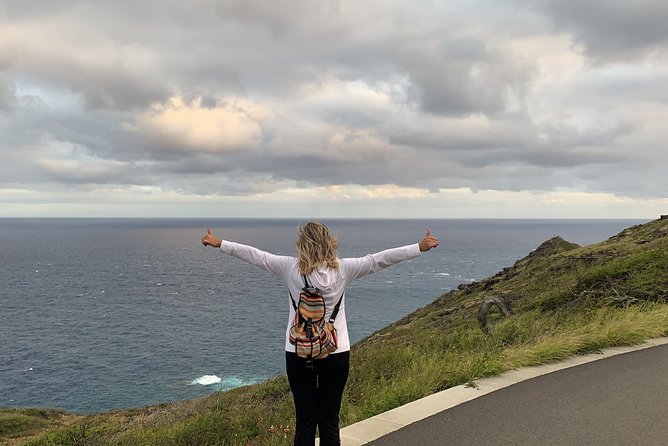
Makapu’u Lighthouse Trail on foot: paved, scenic, and still a real climb
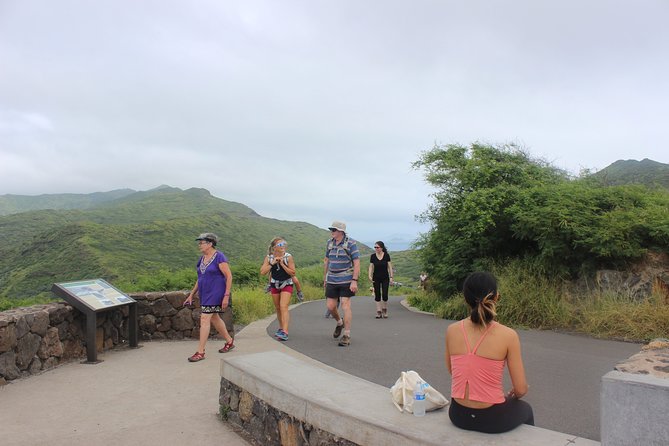
Now for the main event: the Makapu’u Lighthouse Trail. You’ll tackle a self-guided 2.5-mile hike along paved paths, with moderate elevation and sweeping coastline panoramas.
Here’s the key detail: paved doesn’t mean flat. The climb feels like a steady uphill rhythm, and most people find it manageable because it’s consistent—not technical. Several reviews describe it as easy to access and enjoyable once you get into the pace, with spectacular views at almost every turn.

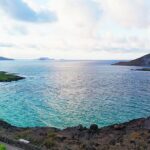

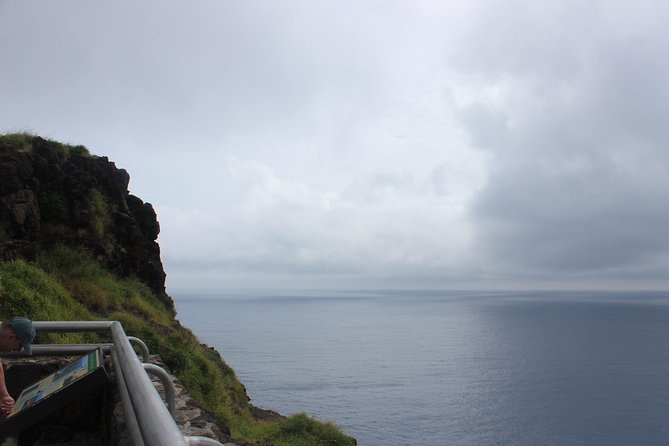
What you can see from the trail
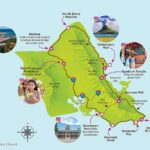
The views are the whole point here. On clear days, the coastline unfolds in layers: sights toward Koko Head and Rabbit Island, plus open Pacific views where you can scan for whales in the season. The info also notes that on clear days you may spot Moloka‘i and Lana‘i, which makes the lookout time feel extra rewarding.
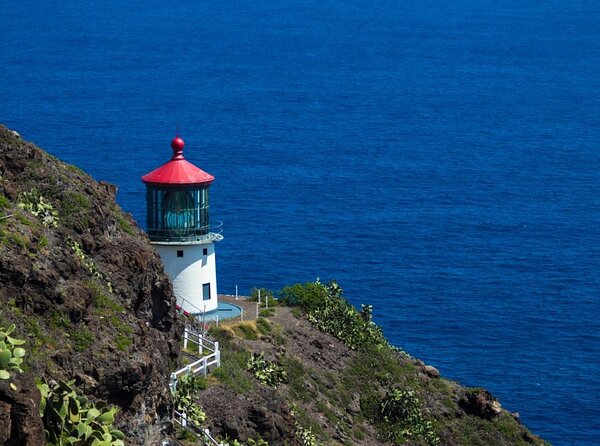
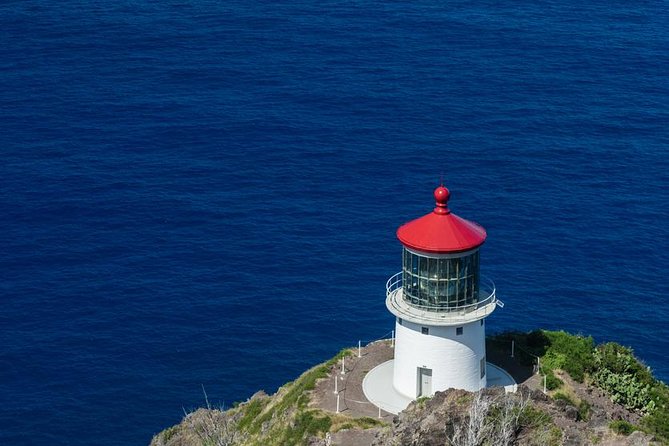
The lighthouse itself: great photos, not a visit inside
One thing I want you to know before you build expectations: you can admire the lighthouse and surrounding coastline, but you can’t go inside. The views from the trail are the win. People who are into photography point out that getting the best angle can take a bit of patience due to access limits around the lighthouse.
Whale-watching chances from the viewpoints (Nov–Apr)
This is one of Oahu’s better spots for humpback whales—especially from November through April. When whales are around, you can see behaviors like breaching and spouting from coastal viewpoints along the route.
Even when whales don’t show off close-up, this area often still delivers something: a spout far out, a distant tail slap, or seabirds riding the wind along the cliffs. In other words, the day doesn’t turn into a dud just because you didn’t land the “perfect” whale moment.
Best way to use whale watching here
Bring the habit of scanning, not the expectation of constant action. Stop at lookouts when you see people pausing. Look both directions from your position. If you have them, binoculars are a big advantage—more than you’d think until you’re trying to track a spout far offshore.
How long you’ll need: making the 4 hours feel unhurried
The total experience time is listed at about 4 hours. That usually translates into enough time to do the hike without feeling like you’re sprinting, but you still want to stay practical.
A few practical patterns show up in real-world use:
- You’ll get dropped off with a set window, and you hike at your own pace.
- Many people land on a “walk up, take breaks, then walk down” rhythm.
- Several reviews describe a couple of hours available for the trail itself, which is perfect for slow viewing and photos.
If you want the day to feel relaxed, start early in the day if possible. One review explicitly suggests doing it earlier, and I agree with the logic: more breeze, better lighting for photos, and fewer “standing around waiting for the group” moments.
Why the self-guided setup works here
Because the trail is paved, you don’t need a guide to “lead” you. You need a shuttle to get you there and back, and then you need time to stop and look. That’s exactly what you get.
Guides and the small extras: why the price feels fair
At $38.99 per person, you’re paying for more than a hike ticket. You’re covering the transportation, the national park fees, and bottled water. When you add those pieces up, the value is easier to see—especially if you’d otherwise pay for parking and logistics.
Also, the ride can be genuinely useful. Multiple drivers are named in reviews, including Tommy, Matthew Kenny, Diogo, Kevin, and Matt. People highlight that their storytelling and local tips made the drive better and made it feel like you got more than just transportation.
A small example that matters: one review notes the guide made sure there was time to use a bathroom before starting. That kind of heads-up sounds tiny, but it changes how calm your hike feels once you’re on the trail.
And yes, the info says drivers and reception staff may speak Portuguese. If that’s helpful for you, it’s worth noting when you check in.
What to bring (and what to wear) for Makapu’u
This is a straightforward hike on paved paths, but you still need the basic tools for comfort.
Bring:
- Binoculars, if you enjoy whale spotting
- Sun protection (hat helps; one review called it out specifically)
- Extra water if you tend to drink more than average, even though bottled water is provided
- Shoes with grip for wet conditions, since rain can happen and parts of the trail can get muddy
Pack light but smart. You’re walking uphill, taking photos, and stopping often. If you’re weighed down, you’ll feel it by the time you hit the upper viewpoints.
Who should book (and who should skip)
This outing is a good fit if you want:
- A paved hike with ocean views
- A chance at whales in season
- A simple day structure with a shuttle that handles the hard parts
It’s not for everyone. The tour info says it’s not recommended for children under 3, for people with disabilities, and not recommended for ages older than 65. Based on the hike profile, that makes sense—because it’s paved, but still uphill.
If you have a knee or back issue, don’t assume paved means no impact. One review from a 64-year-old with knee history described the climb as more uphill than expected, even though the scenery made it worth it. So be honest about your limits and plan a pace you can sustain.
Should you book the Makapu’u Lighthouse Trail and Shuttle Service?
Yes—if you want an easy-to-manage hike with big payoff, plus the Halona Blowhole stop, without dealing with parking and timing headaches. The biggest selling points for me are the paved trail, the scenic viewpoints, the whale chances in season, and the fact that park fees plus water are included.
Maybe skip or switch if:
- You need a flatter walk and you’re worried about uphill effort
- You were hoping to actually enter the lighthouse building (you can’t)
- You get stressed by pickup timing and meeting windows
If you’re staying in Waikiki and you’d rather spend the day watching the ocean than solving logistics, this is a strong use of a few hours in Honolulu.
FAQ
How much is the Makapu’u Lighthouse Trail and Shuttle Service?
It costs $38.99 per person.
How long does the tour take?
Plan for about 4 hours (approx.).
Is pickup included, and where does it start?
Yes. Pickup is offered from Waikiki. If you’re not staying in Waikiki, there is free parking at 2805 Monsarrat Ave, and you walk to the Queen Kapiolani Hotel for shuttle pickup.
What stops are included during the tour?
You’ll stop at Halona Blowhole first, then continue to the Makapu’u Point Lighthouse Trail.
Is the hike self-guided?
Yes. The Makapu’u Lighthouse Trail is self-guided, and you hike at your own pace.
Do I need to pay park fees?
National Park fees are included.
Can you enter the lighthouse?
No. The experience focuses on views from the trail and surrounding area; you cannot go into the lighthouse.