REVIEW · CANOES & KAYAKS
Oahu: Mokoliʻi Kayak Rental and Self-Guided Hike
Book on GetYourGuide →Operated by Active Oahu, LLC · Bookable on GetYourGuide
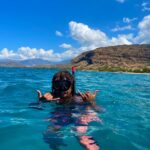
Wind on your face. Salt in the air. This self-guided kayak-and-hike outing to Mokoli’i (Chinaman’s Hat) is a rare combo: you paddle out first, then hop off and hike a tiny ocean island. I like the way the equipment pickup happens right by the beach, so you spend less time fussing and more time moving.
Next up is the payoff: ocean views of the Ko’olau Mountain Range and Kaneohe Bay from the water, then different angles when you’re on foot. I also love that it’s family- and friends-friendly—no group pacing, and you can enjoy the bird sanctuary at your own rhythm.
One thing to think about: this is the windward side of Oahu, so it’s often breezy or even very windy. If you’re not a strong swimmer or you’re hiking in slippery spots without solid shoes, you’ll feel it.
In This Review
- Quick take: key reasons this kayak-hike works
- Getting to the water: Active Oahu Tours, Kailua pickup, and the 30-minute run
- Paddling to Mokoli’i: the salt-air highlight on Oahu’s windward side
- The island landing and the self-guided hike loop
- Nature rules you actually need to follow
- Gear and what to bring: staying comfortable in sun, wind, and wet sand
- Timing, pace, and how long you’ll be on the go
- Safety reality check: who should skip, and how to judge conditions
- Value and what you’re paying for: $82 for a rare water-to-island combo
- Who this is best for (and who it isn’t)
- Should you book Mokoli’i kayak and self-guided hike?
- FAQ
- How long is the Mokoli’i kayak and self-guided hike?
- Where do I pick up the kayak?
- Is there a tour guide on the water?
- Do I need to bring my own car?
- What should I bring?
- Is this suitable for kids?
- Are there any restrictions on what I can do?
- When is the best time to go for calmer conditions?
Quick take: key reasons this kayak-hike works

- Self-guided freedom: you explore at your own pace with just your group.
- Paddle first, hike second: ocean scenery from the kayak and views from the islet on land.
- Kailua base that’s easy to find: pickup at Active Oahu Tours, then a short drive to launch.
- Bird sanctuary rules: you’ll be in a protected place, so stay on trails and don’t touch animals.
- Wind changes everything: summer often feels calmer; winter can feel strong.
Getting to the water: Active Oahu Tours, Kailua pickup, and the 30-minute run

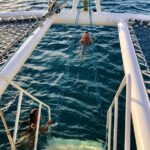
You start in Kailua at Active Oahu Tours, 134B Hamakua Dr., Kailua, HI 96734. The nice part is that the team meets you at the storefront, and they help you with the practical stuff—especially strapping the kayak onto your vehicle.
You’ll need a 4-door car because you’re transporting the kayak yourself. Plan for the day to include a roughly 30-minute drive from the meeting point to where you begin the activity. That matters because this isn’t a “walk to the beach and go” experience. You’re doing a real outdoor outing where the logistics have to be handled cleanly.
Also keep expectations straight: this is self-guided. There’s an English-speaking host/greeter at pickup, but there’s no tour guide riding along in the moment. You’ll want to feel comfortable following safety instructions and using what you’ve been given.
You can also read our reviews of more guided tours in Oahu

Paddling to Mokoli’i: the salt-air highlight on Oahu’s windward side

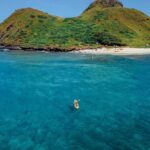
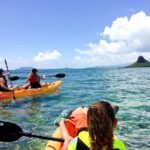
The core magic is the paddle out to Mokoli’i, also known as Chinaman’s Hat. As you move farther from shore, you get those classic East Oahu perspectives—especially with the Ko’olau Mountain Range framing the view. Kaneohe Bay and the ocean around you tend to look bright and open, and that’s where the trip earns its “wow” factor.
Because this is on the windward side, you’ll likely feel the weather on your skin. Even when conditions are good, it’s usually breezy. The change from calmer, sheltered water to open ocean can be a mental shift for first-timers, so don’t treat the trip like a casual float.
The good news: this operator positions the experience as one of the safer Oahu kayak options under normal or ideal conditions. Still, they’re clear that ocean conditions can change quickly, and kayaking can be dangerous if conditions turn. In practice, that means you should take the day seriously. If you’re unsure about wind, current, or your own stamina, this is the day to err on the cautious side.
One more practical tip: since you’re paddling and then hiking, keep your energy for the switch. Go steady on the way out so you’re not cooked before your feet hit the trails.
The island landing and the self-guided hike loop

Once you reach Mokoli’i, the trip flips from paddling to hiking. This is where you stop thinking only about motion and start thinking about footing and views.
You’ll explore the islet around its perimeter for broad ocean views. In clear conditions, the big story becomes how the coastline and mountains look from a tiny land pocket surrounded by water. You also get a change in the “feel” of the trip: silence breaks in a different way when you’re on land. It’s still coastal, still breezy, but your pace becomes slower and more deliberate.
There are also defined trails if you want a more structured route than just walking the edges. The key rule is staying on the trail. That protects fragile areas and keeps you away from the slippery or sensitive spots.
You’ll want good hiking shoes. One of the most useful lessons from experience is simple: some sections can be difficult and slippery. If your footwear is more “sandal day” than “solid tread,” you’ll struggle more than you expected.
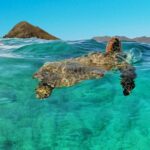
And yes, this is not just a scenic stop. Mokoli’i is a bird sanctuary, and in springtime you may see fluffy baby chicks. That’s adorable, but treat it with respect. Don’t go reaching for wildlife, don’t get close for photos at the expense of the birds, and don’t wander off-trail to “get a better angle.”
Nature rules you actually need to follow
This experience is built around a protected shoreline and living wildlife. The rules aren’t there to ruin the fun—they’re there to protect the island.
Here’s what you should treat as non-negotiable:
- Stay on the trail. It’s not just about safety; it’s about not damaging the protected space.
- No littering, and pick up any litter you see. Keep it clean.
- Do not touch marine life or touch animals. This includes birds.
- Look, don’t touch. If you want photos, get them without crowding.
If you follow those, your day feels smoother. You’re not constantly worrying about what not to do. You just walk, observe, and take in the views.
Gear and what to bring: staying comfortable in sun, wind, and wet sand

This outing is only four hours on the calendar, but you’ll be dealing with sun, spray, and changing surfaces—sand, water, and then walking. Your packing list is straightforward, and you should treat it like a checklist.
Bring:
- Change of clothes (you’ll feel better fast after being damp)
- Hiking shoes with grip (or at least footwear you can trust on uneven and possibly slippery sections)
- Sunscreen
- Water
- Water shoes (useful because you’ll likely deal with wet footing and the chance of sharp or slippery surfaces)
Wind also affects comfort. In breezy conditions, you may feel cooler than you expect while paddling, even when the sun is strong. That’s another reason a quick change of clothes helps—especially if you’re traveling with kids.
One more practical mindset: you’re going from water to land and back. Don’t pack like it’s a pure hiking day. Pack like it’s an ocean day.
You can also read our reviews of more tours and experiences in Oahu


Timing, pace, and how long you’ll be on the go

The total duration is 4 hours, but what that means in real life is a mix of paddling time plus time on the island and time for getting set up. You’ll be on water first, then hiking at your own speed, then paddling back.
It’s smart to plan for a pace that supports both parts:
- If you sprint the kayak, you’ll pay for it during the hike.
- If you take the hike too aggressively, you’ll feel it on the paddle back, when fatigue matters.
A self-guided format helps because you can respond to conditions. If the wind feels stronger than expected, you can slow down on land and use your energy wisely.
Also note the age guidance. This trip is best suited for children over 12, but younger kids can join when conditions are nice. The operator also lists several “not suitable” categories (more on that next), so take the limits seriously rather than assuming you can improvise.
Safety reality check: who should skip, and how to judge conditions

Ocean kayaking has one job: don’t pretend it’s risk-free. The operator explicitly warns that conditions can change quickly and kayaking can be dangerous. The experience is described as among the safest options under normal or ideal conditions, but you still need to be realistic.
You should not plan on this if you’re in any of these groups:
- Children under 3
- Non-swimmers
- Children under 33 lbs (15 kg)
- Pregnant women
- People with mobility impairments or wheelchair users
That list isn’t picky for fun. It’s about physical safety, balance, and the reality of being on open water.
Wind is the big variable. Since this is the windward side, it’s almost always breezy and sometimes very windy. Summer months, roughly from end of May to beginning of September, tend to be calmer and more predictable, and the area becomes more accessible for beginners or inexperienced kayakers. If you’re new to kayaking, that seasonal timing is your friend.
If storms or high winds are coming, you’ll be notified so the outing can be rescheduled or refunded. That’s the responsible approach, and you should treat it as a sign the operator is paying attention to conditions, not just money.
Finally, remember: you’re self-guided. There’s no guide making decisions for your group in the moment. That can be liberating, but it also means you need to follow the safety and wildlife rules closely.
Value and what you’re paying for: $82 for a rare water-to-island combo
At $82 per person for about 4 hours, you’re paying for two experiences that don’t usually combine cleanly: ocean kayaking and a hike on an actual islet. You also get convenience that’s hard to beat—equipment delivery and pickup right next to the beach, plus someone on-site to help with strapping the kayak to your vehicle.
No food is included. So the “value math” depends on what you’d otherwise pay for a guided kayak and a separate hike. If you already planned to visit East Oahu scenery, this route packages it into one half-day outing with a strong change of scenery.
It’s also cost-effective for small groups and families because self-guided means you’re not paying for a guide’s time at every step. In exchange, you’re taking more responsibility for pacing and safety judgment, especially in wind.
One practical caution: the total cost can feel disappointing if anything you expected isn’t covered. I’d treat the price as a starting point and verify what’s included before you go, especially if you’re budgeting tightly.
Who this is best for (and who it isn’t)
This kayak-hike works especially well for:
- Families and friends who want time together without a loud tour schedule
- People who want East Oahu scenery from both sea level and trail level
- Travelers who can handle changing conditions and want a bit of adventure
It’s less ideal if:
- You hate hiking on slippery footing or don’t have solid shoes
- You’re nervous in wind or open water
- Your group includes anyone who doesn’t meet the operator’s non-suitable categories (especially non-swimmers and very young kids)
If you’re an average hiker who pays attention to footing, you’ll likely enjoy it. If you’re used to casual beach walking only, you might find parts more challenging than expected.
Should you book Mokoli’i kayak and self-guided hike?
Book it if you want a hands-on Oahu experience that mixes paddling scenery with a real island hike, and you’re comfortable handling the self-guided nature of the day. I especially think it’s worth your time if you’re visiting Oahu’s windward side and want views of the Ko’olau range from more than one angle.
Skip it (or choose a calmer timing) if you’re not confident in windy conditions, you don’t have grippy footwear, or anyone in your group falls into the non-suitable categories. This is one of those activities where “it’ll probably be fine” can turn into a rough day fast.
If you do book, come prepared for wind, pack proper footwear, and respect the bird sanctuary rules. Do that, and Mokoli’i becomes exactly what you hope it is: a small place with big Oahu energy.
FAQ
How long is the Mokoli’i kayak and self-guided hike?
The total duration is 4 hours.
Where do I pick up the kayak?
You pick up at the Active Oahu Tours storefront, 134B Hamakua Dr., Kailua, HI 96734.
Is there a tour guide on the water?
No. This is a self-guided experience with no tour guide present during the activity.
Do I need to bring my own car?
Yes. You’ll need a 4-door car to transport the kayak. The team helps you strap the kayak to your vehicle.
What should I bring?
Bring change of clothes, hiking shoes, sunscreen, water, and water shoes.
Is this suitable for kids?
It’s best suited for children over 12, but younger children may join if conditions are nice. It is not suitable for children under 3 or children under 33 lbs (15 kg).
Are there any restrictions on what I can do?
Yes. Alcohol and drugs are not allowed, and you must not litter or touch marine life or animals. You should respect local wildlife by looking but not touching.
When is the best time to go for calmer conditions?
Summer months (end of May through beginning of September) tend to be calmer and more predictable, with better accessibility for beginners or inexperienced kayakers.