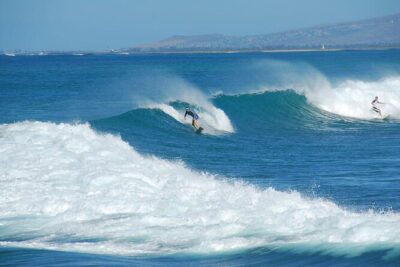
REVIEW · CANOES & KAYAKS
Rainforest River Kayak Self-Guided Kayak Tour
Book on Viator →Operated by Active Oahu Tours · Bookable on Viator
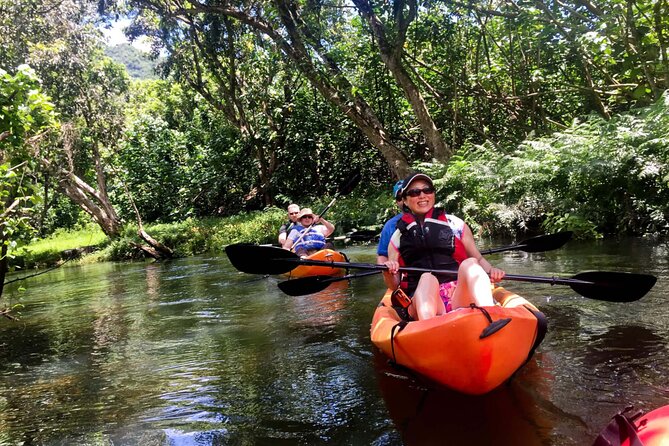
Rainforest paddling beats the beach. A self-guided kayak outing in Kahana Valley lets you take in green jungle tones and big ocean views without racing anyone else.
I like that everything is set up for you to succeed: all necessary kayaking equipment is provided, and the water is calm enough for an easy learning curve. You’ll also get scenery that feels more private than most Oahu activities, with coast-and-mountains views while you paddle.
One consideration: depending on how you paddle the route, you might spend time in areas that feel more canal-like than pure jungle, and there can be a short beach porter on the way back.
Key highlights you’ll actually care about
- Self-guided pacing: you choose when to stop, look, and turn back
- Calm water in a river/estuary setting that works for first-timers
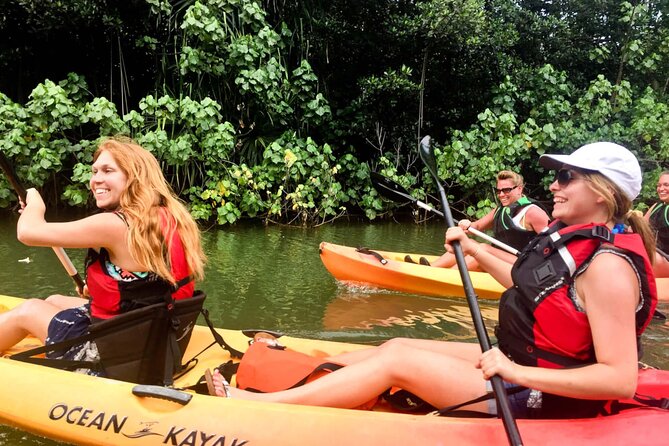
- Gear included: life vests plus everything needed to get on the water
- Kahana Valley views: green, ocean-facing, and mountain backdrops
- Two launch options: transport about 1 mile, or launch across the street and paddle through the bay
In This Review
- Why Kahana Valley Feels Special for a Self-Guided Kayak
- Price and Value: What $82 Buys You (and What It Doesn’t)
- Getting There: Kailua Meeting Point and the 40-Minute Ride to Launch
- Gear and Self-Guided Setup: What’s Provided and What You Should Bring
- Two Ways to Launch: Transport the Kayak or Paddle From Across the Street
- Paddling the Route: Jungle Feel, Canal Sections, and Mountain Views
- What the 4 Hours Feels Like on Calm Water
- Staffing That Matters: Easy Instructions and Fast Setup
- Who This Tour Suits Best (and Who Should Rethink It)
- Cancellation, Tickets, and Planning Your Timing
- Should You Book This Self-Guided Kayak Tour in Oahu?
- FAQ
- FAQ
- Where is the tour meeting point?
- How long is the Rainforest River Kayak self-guided tour?
- Is the tour self-guided?
- What kayaking equipment is included?
- Do I need to bring a drybag?
- What should I wear or bring?
- How do I get the kayak to the water?
- When should I arrive?
- Is the tour okay for beginners?
- What’s the fitness level required?
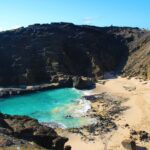
Why Kahana Valley Feels Special for a Self-Guided Kayak

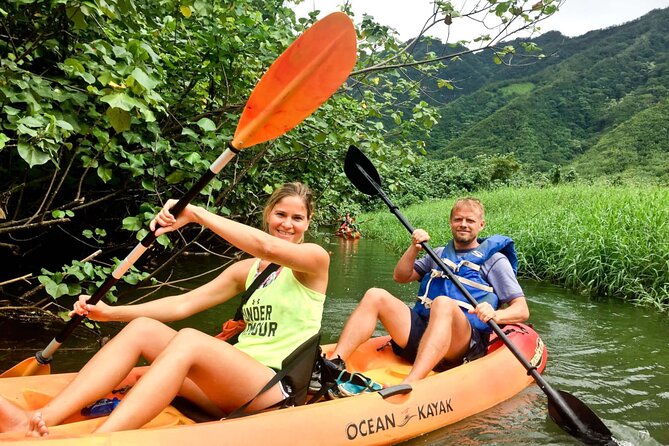
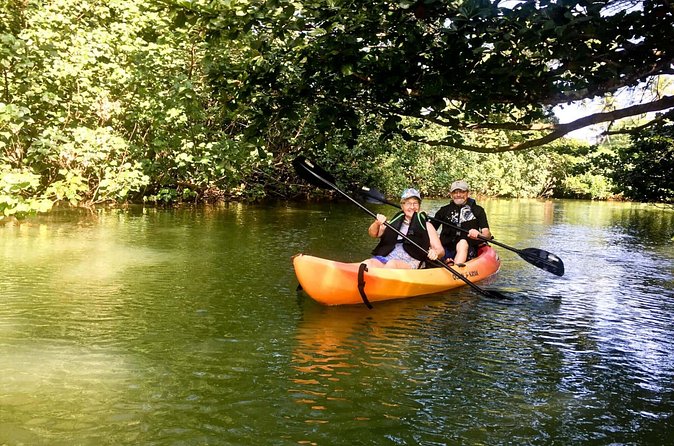
This tour is built around a simple idea: you get to paddle Oahu without a rigid schedule. The payoff is that you can soak up the quiet rhythm of calm water at your own pace, then stop for photos when the view turns dramatic—jungle canopy to blue horizon in one sweep.
I also like the “learn as you go” angle. The experience is suitable for all levels, even if you’ve never handled a kayak before. You’re not being thrown into surf or fast-moving water—you’re being given a path where you can get your balance, understand the paddle strokes, and focus on what you came for: the scenery.
You should know that this is still Oahu. Even in a secluded-feeling area, you may pass through parts that run alongside residential property before the route opens up again. If your mental image is nonstop thick rainforest with zero human presence, you’ll want to pay attention to where you paddle inside the valley for the most scenic, secluded feeling.
Price and Value: What $82 Buys You (and What It Doesn’t)
At $82 per person for about 4 hours, this sits in the “you’re paying for a full, guided-like setup” category—except you’re doing the paddling yourself. What makes it feel reasonable is that you’re not just renting a kayak. You’re getting life vests and the kayaking equipment, plus a self-guided experience designed to work for beginners.
The value also comes from location. You’re heading to Kahana Bay / Kahana Valley, an area that’s described as a natural navigable waterway on windward Oahu and suitable for kayaking year-round. When a destination is the point, paying for access to the right waterway matters more than the kayak itself.
What it doesn’t include (at least based on the info you’re given) is a guided walk-through of the valley’s most interesting spots. That can be a plus for independent travelers, but it also means the best experience depends on how confidently you follow the route and how far you paddle into the more secluded side of the water.
You can also read our reviews of more guided tours in Oahu


Getting There: Kailua Meeting Point and the 40-Minute Ride to Launch
Your adventure starts at 134b Hamakua Dr, Kailua, HI 96734. The activity ends back at that same meeting point, which keeps the logistics clean—you’re not piecing together separate transport plans after you paddle.
One important detail: you’ll need to arrive about 15 minutes before your tour. The tour includes a 4-door vehicle that transports the kayak to Kahana Bay, roughly 40 minutes away. This matters because the kayak setup and loading can’t be rushed. It’s also where staff help you get the gear where it needs to be for a smooth start.
If you’re thinking about timing, treat the ride as part of the experience, not dead time. When you get to the launch area already familiar with what you’re doing, the first minutes on the water feel calm instead of chaotic.
Gear and Self-Guided Setup: What’s Provided and What You Should Bring
This is set up to be simple. You should show up ready with the right clothing and mindset, and let the tour handle the rest.
Here’s what you can count on being provided:
- Life vests
- All other kayaking equipment
- Foam pads and straps to help transport the kayaks
- A drybag provided with the self-guided experience (use it for valuables)
On your side, you’ll want to do the basics well:
- Apply sunscreen
- Wear a swimsuit
- Leave valuables at home, or use the drybag
What I like about this gear approach is that it reduces the usual “vacation tax” where you spend money renting gear or buying last-minute accessories. Even if you’ve kayaked before, the straps/foam pads are a practical touch that makes the process easier than it sounds.
Two Ways to Launch: Transport the Kayak or Paddle From Across the Street
You’ll face a choice that affects how the day feels. The tour information gives two options for getting the kayak to the water:
1) Transport the kayak about 1 mile using a vehicle
2) Launch across the street, then paddle through the bay to reach the river/valley
If you’re the kind of traveler who likes minimizing extra work, the across-the-street approach can feel more relaxed. If you prefer controlling where your first paddle miles happen, using the vehicle option may help you get aligned faster.
Either way, be ready for a day that includes more than just sitting in a kayak. The route is described as involving calm paddling, but you should still plan on active moments—especially around turns, exits, and any short carry sections that show up depending on the path you take.
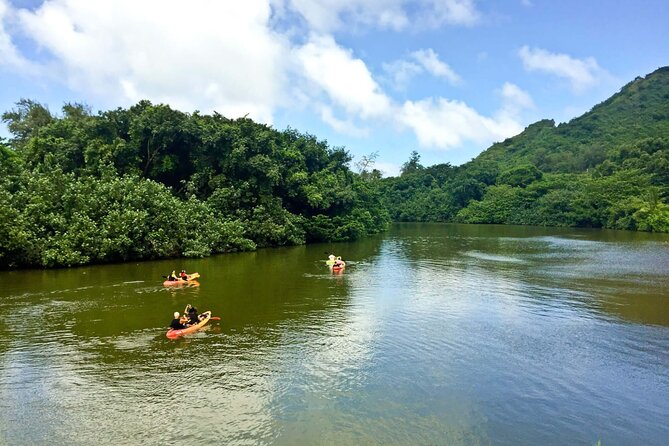
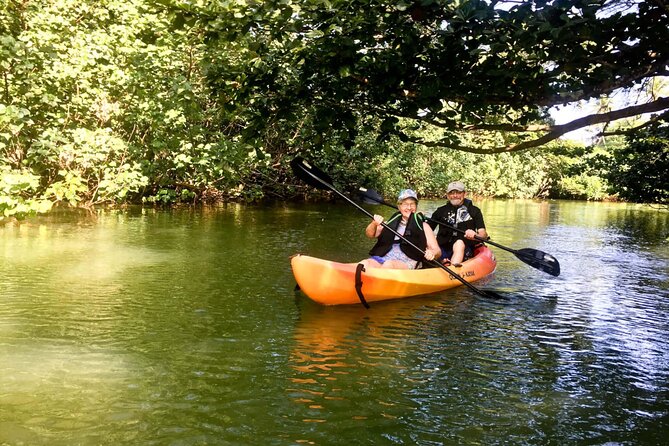
Paddling the Route: Jungle Feel, Canal Sections, and Mountain Views
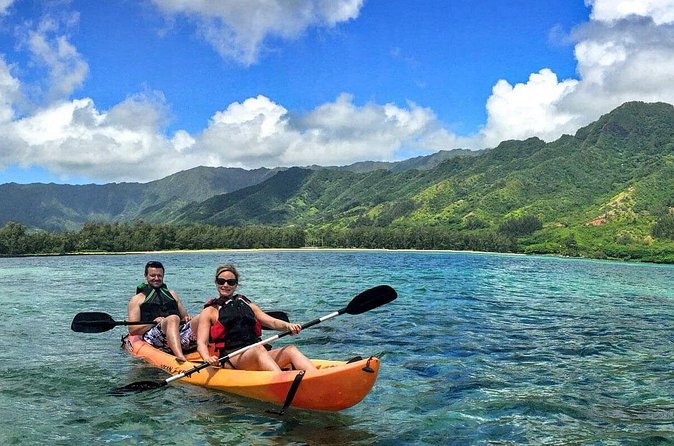
The biggest reason to book this is the scenery mix. You paddle through an exclusive part of Oahu, and the route is described as offering both Oahu coast and mountains views. That “green + horizon” combo is why this works so well as a break from the typical beach circuit.
Here’s the reality: the waterway is described as an estuary fed by fresh water streams, so it’s not exactly a classic upstream river where you’ll glide for hours through untouched wilderness. Instead, you’re navigating a system that can shift in character.
You might encounter areas that feel more canal-like, lined with properties, before the scenery opens up. That’s the piece that can change your experience a lot.
To get more of the rainforest-and-jungle feeling, you’ll want to paddle toward the more secluded part of the route, including the area described as having locally placed rope swings. That’s where you’re more likely to see mountain views and a stretch that feels less like you’re cutting through the edge of neighborhoods.
And then there’s the ocean payoff. As you head out toward the bay, you’re in position to enjoy bigger panoramas. One particularly specific detail from the route: there’s an ancient Hawaiian fish pond described as built with professionally stacked rocks. Even if you don’t know the story ahead of time, you’ll likely notice that you’re passing a carefully constructed feature in the water—something that adds meaning to the scenery beyond just pretty photos.
If you’re expecting a one-way, straight shot into a perfect untouched jungle corridor, you might feel let down. If you expect a scenic paddle through a real working environment—fresh streams meeting the sea—then this experience fits nicely.
You can also read our reviews of more tours and experiences in Oahu


What the 4 Hours Feels Like on Calm Water
Plan on about 4 hours on the outing, and remember that “4 hours” is time on the clock, not just time spent paddling fast.
Because the water is described as calm, you can move at a relaxed pace:
- Paddle steadily without white-knuckle effort
- Pause to look up at the greenery
- Take in the sea views when the route angles outward
The self-guided format is a big part of why 4 hours works. You aren’t forced to keep up with a group if you want slow cruising. But it also means you’re responsible for your turnaround decision—if you wait too long to explore the more secluded side, you’ll feel rushed when it’s time to head back.
Also, be mentally ready for a short “hands-on” moment. One review notes a beach porter and a need to steer back toward the launch canal on the return route. Even if your exact experience varies, it’s smart to think of this as part paddling, part quick management of where the kayak needs to go.
Staffing That Matters: Easy Instructions and Fast Setup
Even though it’s self-guided once you’re on the water, the start matters. Good instructions can be the difference between a first paddle that feels smooth and one that feels stressful.
One helpful detail from the experience info: staff provide simple, easy-to-understand instructions for setting up the kayak and getting it onto the car. A review specifically calls out Jason for being great and having the equipment on time. That kind of early clarity helps you get your bearings fast, especially if you’ve never handled foam pads, straps, and kayak loading before.
If you’re nervous about being self-guided, this is the kind of reassurance you want. You’re not just handed a kayak and sent off.
Who This Tour Suits Best (and Who Should Rethink It)
This tour is a strong match for:
- Beginners who want easy-to-learn kayaking without rough conditions
- Families and mixed-experience groups who want calm water time together
- Travelers who like scenery and want a route they can explore at their own pace
It’s also a nice fit if you enjoy practical independence. You’ll be doing the paddling yourself, which means you can stop when something catches your eye instead of waiting for a group to catch up.
You might want to reconsider if:
- You only want a long stretch of pure rainforest with zero residential edge (the route may include canal-like stretches)
- You dislike any short carry/porter steps on sand
- You’re looking for a guide-led interpretation of the area’s history in real time (this is self-guided, and the information you receive is focused on getting you on the water)
Cancellation, Tickets, and Planning Your Timing
A mobile ticket is part of the setup. Confirmation is received at booking, and the tour is near public transportation, which can help if you’re not driving on the day.
For planning, average booking is about 6 days in advance. That doesn’t mean you can’t book later, but it’s a good clue that this is a popular time-saver for visitors who want calmer, nature-focused activities without complicated logistics.
Should You Book This Self-Guided Kayak Tour in Oahu?
I’d book it if you want a calm, scenic paddling experience that’s beginner-friendly and includes the gear, with the freedom to choose your pace. The price makes more sense when you treat it as access to a specific waterway plus the equipment setup, not just a kayak rental.
I’d think twice if you’re imagining a full-on, unbroken jungle river with no canal segments and no carry moments. The route can be excellent—especially if you paddle toward the more secluded side of the valley—but it’s not a “perfect fantasy stream” experience.
FAQ
FAQ
Where is the tour meeting point?
The tour meets at 134b Hamakua Dr, Kailua, HI 96734, USA, and it ends back at the same meeting point.
How long is the Rainforest River Kayak self-guided tour?
It lasts about 4 hours (approx.).
Is the tour self-guided?
Yes. The experience is self-guided, and you paddle at your own pace.
What kayaking equipment is included?
Life vests and all other kayaking equipment are provided. Foam pads and straps are also provided to help transport the kayak.
Do I need to bring a drybag?
A drybag is provided with the self-guided experience. You’re also advised to leave valuables at home or use the drybag.
What should I wear or bring?
Apply sunscreen and wear a swimsuit. You should also plan to have what you need for handling the kayak and the water time.
How do I get the kayak to the water?
The information gives two options: transport the kayak about 1 mile by vehicle, or launch across the street and paddle through the bay to reach the river.
When should I arrive?
Arrive about 15 minutes before the tour so staff can use a 4-door vehicle to transport the kayak to Kahana Bay.
Is the tour okay for beginners?
Yes. It’s suitable for all levels of kayaking experience, including beginners, and it’s described as easy to learn.
What’s the fitness level required?
You should have a moderate physical fitness level.
If you want, tell me your kayaking comfort level and whether you’ll have a rental car—I can help you choose the smoother launch option for your day.