REVIEW · PHOTOGRAPHY SESSIONS
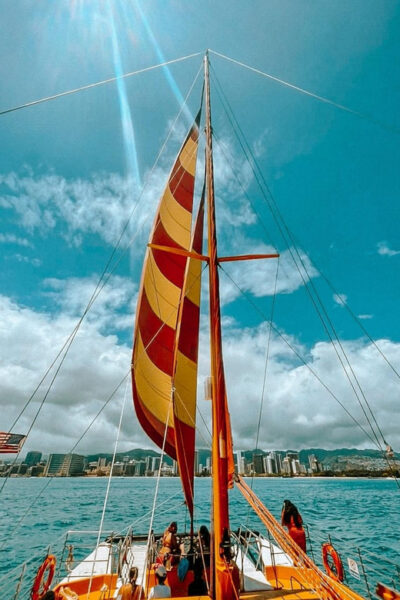
Beautiful Colors of Hawaii Photo Tour
Book on Viator →Operated by Oahu Photo Tours · Bookable on Viator
Oʻahu turns into a photo playground fast. This 5.5-hour small-group tour is built for getting better shots at famous-but-hard-to-photograph spots like Halona Blowhole and Waimanalo, with hands-on phone-friendly coaching along the way. I especially like the tight timing at each viewpoint and the way the guide helps you frame rather than just point. One thing to consider: if you’re picked up last, you may end up in the back of the van, which can feel tight and make it harder to hear the guide.
If you’re the kind of person who wants more than another “stand here, take photo, done” outing, this tour fits. The mix of overlooks, coastline, and a local plate-lunch stop gives your camera (or phone) a lot to work with. And because it runs rain or shine, you’re not stuck waiting for perfect weather.
For most people, it’s an easy way to see Oʻahu’s dramatic sides without driving. There’s a small amount of walking, and you’ll be riding around in an air-conditioned minivan between viewpoints.
In This Review
- Quick hits: what makes this Oʻahu photo tour different
- Price and what $99.95 actually buys you
- Waikiki pickup and the small-group van day
- A fair heads-up on comfort and hearing
- Rain or shine means you dress for reality
- The photo route: Puʻu ʻUalakaʻa to Hawaii Kai
- Puʻu ʻUalakaʻa State Park: start with quick photo basics
- Nuʻuanu Pali Lookout: wind, drama, and strong horizon lines
- Koolaus Mountains: a protected feel with fewer people
- Ono Steaks and Shrimp Shack: the plate-lunch break
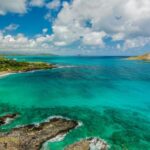
- Waimanalo Beach: color and a beach you don’t spoil
- Makapuʻu Point: panoramics with show-stopping color
- Halona Blowhole: lava-tube water + possible wildlife
- Hawaii Kai Lookout: end with a bay panoramic
- Photography help that’s actually useful (phone or camera)
- The local food break: Ono Steaks and Shrimp Shack
- Weather, wind, and when to expect the best color
- Who this tour suits best
- Should you book the Beautiful Colors of Hawaii photo tour?
- FAQ
- How long is the Beautiful Colors of Hawaii Photo Tour?
- How much does the tour cost?
- Does the tour include hotel pickup in Waikiki?
- What’s included versus not included?
- Is the tour affected by rain?
- How many people are on the tour?
Quick hits: what makes this Oʻahu photo tour different
- Waikiki hotel pickup with an air-conditioned minivan saves you time and hassle on a full sightseeing loop.
- Max 7 people keeps the attention personal, so you can actually ask questions about your shots.
- Stops like Nuuʻuanu Pali and Halona Blowhole are built for wind, sea texture, and that “wow” color you want on camera.
- Makapuʻu and lookout stops are timed for wide angles and panoramics, not just postcard snapshots.
- A local food stop at Ono Steaks and Shrimp Shack breaks up the photo grind with something real.
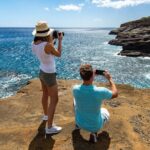
- Phone coaching is part of the point, with guides using iPhones/phones to help compose people with scenery.
Price and what $99.95 actually buys you
At $99.95 per person for about 5 hours 30 minutes, this tour is priced like a “serious value” outing rather than a sightseeing-only bus ride. You’re paying for three things that add up quickly on Oʻahu:
- Transportation from Waikiki (pickup and drop-off at select hotels)
- A local photographer guide focused on how to take better images
- A loop of viewpoints that are spread out enough that driving yourself can eat your day
Food and drinks are not included, so plan on buying lunch (or at least a plate lunch) during the stop. Still, the trade-off is that you get guided access to multiple classic spots—plus practical help—without spending your limited vacation hours on parking and logistics.
If your goal is photos with better composition and less stress, the cost makes sense. If your goal is only sightseeing with no photo coaching, you might feel the price is more than you need.
You can also read our reviews of more photography tours in Oahu

Waikiki pickup and the small-group van day
The tour starts at the Honolulu Zoo (151 Kapahulu Ave, Honolulu) and includes hotel pickup only at selected Waikiki hotels. You’ll ride in an air-conditioned minivan, and the tour caps the group at 7 people.
That small group size matters more than it sounds. It means you can actually hear instructions, reposition quickly at stops, and get help for your specific camera setup—whether that’s a phone or something larger.
A fair heads-up on comfort and hearing
One negative note that came up: if someone gets picked up last, they can end up seated at the back of a small van, which may feel cramped. Another complaint was difficulty hearing the guide due to the setup on that particular day. The tour provider says the van is meant to avoid cramped conditions by limiting the group to 7, but in real life, pickup order can still affect your seat. If you’re sensitive to cramped space or want the clearest audio, aim to confirm your pickup timing early and choose a seat toward the front when you can.
Rain or shine means you dress for reality
The tour operates rain or shine. That’s useful on Oʻahu, where weather can change fast. Bring a light rain layer and wear shoes you can walk in comfortably, because you’ll get out at scenic spots and move between viewpoints.
The photo route: Puʻu ʻUalakaʻa to Hawaii Kai
This day is paced like a photography walk across multiple Oʻahu “moods”: volcanic coastline, mountain overlooks, beach light, and wide bay panoramics. The time at each stop is short on purpose—just long enough to get oriented, shoot, and adjust with help.
Here’s what to expect at each main stop.


Puʻu ʻUalakaʻa State Park: start with quick photo basics
Your first stop is Puʻu ʻUalakaʻa State Park, about 20 minutes. This is where you get your bearings fast: the guide helps you settle in and understand what to look for during the rest of the tour.
This is a smart opening because you’re learning how to see before you hit the bigger wow stops. If you’re new to photography (or phone photography), this is the moment to ask questions like:
- How should I frame this view?
- Where should I stand so the horizon looks right?
- How do I avoid washing out bright sky?
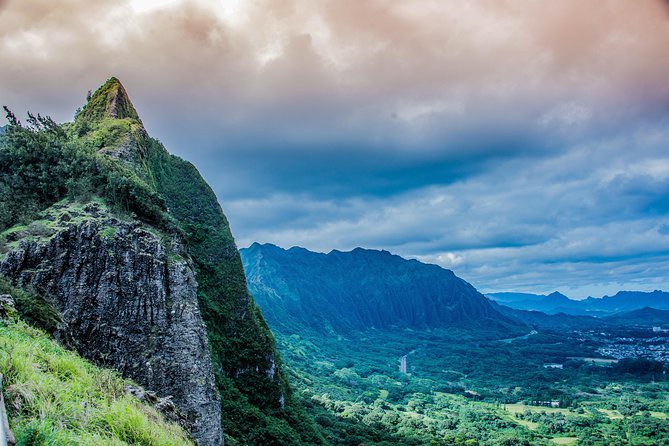
Nuʻuanu Pali Lookout: wind, drama, and strong horizon lines
At Nuʻuanu Pali Lookout you’ll get a classic windward-side view. The timing is about 20 minutes, and yes, it can be very windy. That wind shapes your photos in a good way—cloud motion, sharp sea contrast, and that “edge of the island” feeling.
Practical note: wind can also make it harder to hold a phone steady for sharp shots. If you can, brace your elbows on a railing or stand with feet planted. If you’re using a phone, try short bursts instead of one slow take.
Koolaus Mountains: a protected feel with fewer people
Next comes a local spot in the Koolau Mountains area, again about 20 minutes. The tour aims for a vantage where you can enjoy the mountain range with less crowd pressure than the most obvious viewpoints.
For photography, that’s the key: calmer space helps you compose without constantly stepping around other people. Look for lines—ridgelines, road cuts, and layers of distance—to get depth in your images.
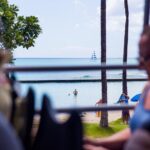
Ono Steaks and Shrimp Shack: the plate-lunch break
Food stop time is about 45 minutes at Ono Steaks and Shrimp Shack. Admission is listed as free, but food and drinks are not included, so you’ll be paying for your own meal.
This stop is valuable because it gives you a real “local lunch” moment in the middle of a photo-focused day. It also helps reset your energy, especially if the morning viewpoints had you walking more than you expected.
One more perk: if you want people-in-photos, this is a natural break where you can relax, then re-focus at the beach and blowhole stops.
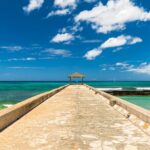
Waimanalo Beach: color and a beach you don’t spoil
Then you hit Waimanalo Beach for about 20 minutes. It’s described as voted the best beach in the United States—plus the tour keeps the exact location off-limits in a fun way (don’t expect to be handed a “here’s the spot” instruction sheet).
What matters for your photos is the light and the shoreline feel. Beach photos can easily turn into bland “sand and sky” shots. The guide’s job is to steer you toward angles and compositions that show Hawaii’s color and texture instead of just wide open space.
Also, the beach timing is short. That’s not a flaw—it’s how you avoid wasting your limited daylight waiting for perfect timing. Shoot a few angles early, then take the time to refine one best composition.
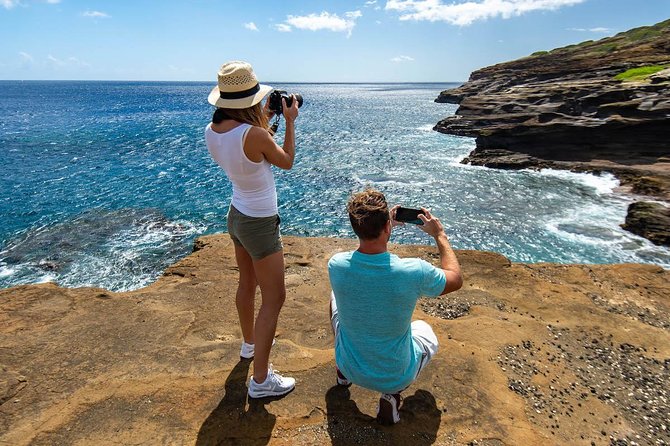
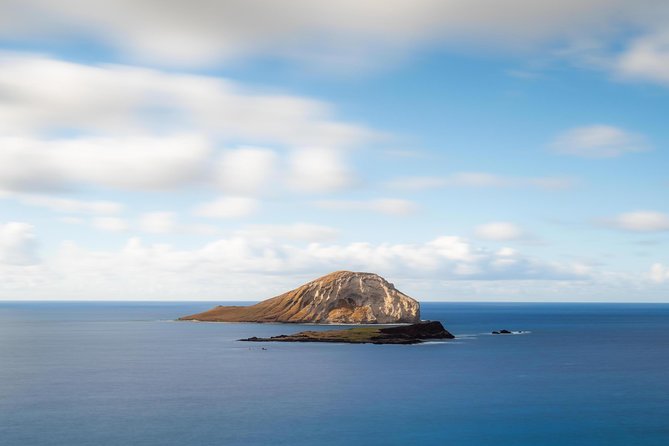
Makapuʻu Point: panoramics with show-stopping color
Makapuʻu Point is another 20-minute stop. This is where the tour leans into color and wide views. The guide can help you capture panoramics, which is perfect here because the viewpoint lends itself to sweeping compositions.
If you’re using a phone, panoramas are hit-or-miss depending on movement and signal in the moment. The safest approach is to take:
- one clean “wide but stable” shot
- one panoramic attempt
- a vertical version for social sharing and detail
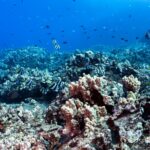
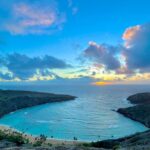
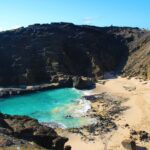
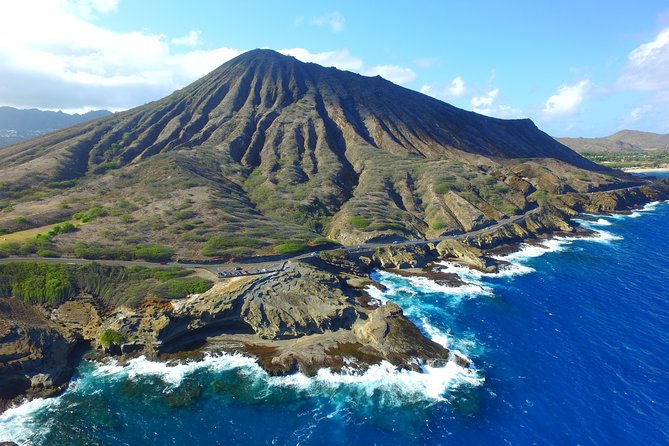
Halona Blowhole: lava-tube water + possible wildlife
Halona Blowhole is one of the headline stops, about 20 minutes. You’re looking for water shooting up from a lava tube area—over 50 feet high when it’s active. This is one of those places where your “wow” photo depends on timing, so it helps to watch for a few seconds before you hit the shutter.
Halona is also a wildlife watch spot. The tour notes the chance to look for whales and turtles. Even if you don’t see them, you’ll still get dramatic sea texture and rock patterns that look great in photos.
Quick practical tip: use a faster shutter setting if your camera/phone supports it. When water is moving, you want motion detail, not blur.
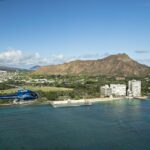
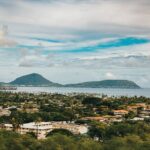
Hawaii Kai Lookout: end with a bay panoramic
The final viewpoint is Hawaii Kai Lookout, about 20 minutes. Expect a wide bay view where panoramics shine again. This stop works as your “send-off” photo moment: you’ve learned how to compose by now, and you’re likely to be faster with your shots.
If you’re running low on battery, this is also the spot to conserve power. Take your best wide shot, then one tighter framing.
Photography help that’s actually useful (phone or camera)
This tour isn’t just about seeing Hawaii. It’s about making your images look like you meant it. The guides focus on practical composition choices at each stop.
Here are a few types of coaching you should expect on the day:
- Framing the horizon so your images don’t tilt or look messy
- Choosing a foreground (rocks, shoreline edges, or mountain lines) to add depth
- Wide angles and panoramics at the lookout points where the view deserves it
- Dealing with wind and bright conditions, especially at Pali and along the coast
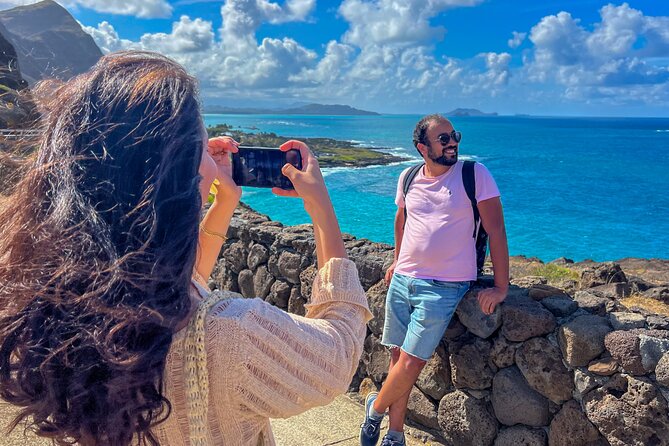
- Using your phone camera confidently, including help that matches how people actually shoot on vacation
In the guide stories, you’ll often hear about tips for iPhone shooting and guides using the phone camera to take photos of people with the scenery. That’s a big deal if you’re traveling with someone but still want photos where you’re in the frame.
Also, it’s common for the guides to share their own photos after the tour. That can be a lifesaver if your shots didn’t work out at exactly the right second.
The local food break: Ono Steaks and Shrimp Shack
You’ll have a full 45 minutes at Ono Steaks and Shrimp Shack. That’s not just about eating. It’s also timing.
Your morning has viewpoint intensity—wind, quick stops, and camera adjustments. Then lunch gives you a breath and helps you avoid feeling rushed later. You can return to the next scenic points with a calmer focus.
What to remember: food and drinks aren’t included, so budget a bit extra beyond the tour price. If you’re picky, take a look at what’s available on-site before ordering, since you won’t have time to wander off.
Weather, wind, and when to expect the best color
The tour runs rain or shine, and it hits several places where the weather is part of the scene. That’s especially true at Nuʻuanu Pali Lookout, where it can be very windy.
In plain terms:
- Rain can add texture, but you’ll want a phone case or protective cover.
- Wind can shake handheld shots, so stand firm and use short bursts.
- Bright sun can blow out skies. Try composing so the sky isn’t taking over the whole frame.
If you get cloud cover, don’t panic. Sometimes the color contrast at coastlines looks even better when the light is softer.
Who this tour suits best

This works best for you if you want a guided photo day with minimal driving and clear help making compositions. It’s a strong choice for:
- First-timers to Oʻahu who want multiple “greatest hits” viewpoints
- Solo travelers who want photos that include them, not just scenery
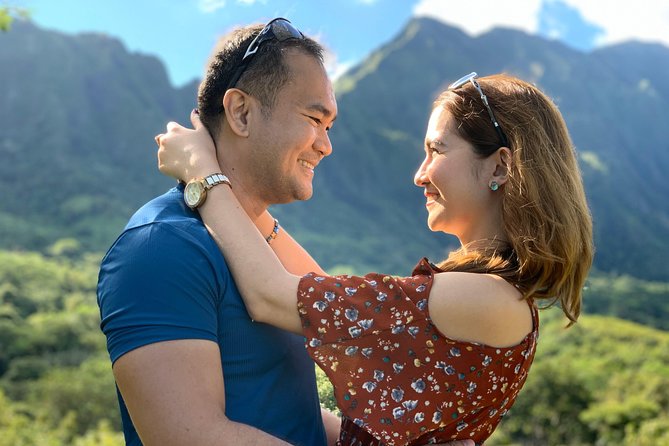
- Couples and honeymooners who like the idea of a photo-focused outing rather than a generic drive
- Phone photographers who want simple, usable coaching
It may feel less ideal if you dislike short stops or you hate any situation where you have to walk briefly and move quickly to the best spots.
Should you book the Beautiful Colors of Hawaii photo tour?
Yes, if your goal is photos with real guidance and you value convenience. This tour is built around a tight loop of high-impact viewpoints—Pali, Makapuʻu, Halona Blowhole, and Waimanalo—plus a local lunch stop. For $99.95, you’re buying time, transportation, and a guide who helps you see and frame rather than just admire.
I’d book it if:
- you only have a day or half-day in Oʻahu and want variety
- you’d rather pay for pickup than rent a car for a route like this
- you want coaching that works for phone cameras
I’d think twice if:
- you’re very sensitive to cramped seating due to pickup order
- you need long time at each stop for wandering and slow shooting
If you’re on the fence, here’s my practical suggestion: plan your day so you’re not rushing. Show up with charged phone/batteries, wear shoes you can move in, and treat the stops like mini photo assignments. You’ll get far more out of the day that way.
FAQ
How long is the Beautiful Colors of Hawaii Photo Tour?
It’s about 5 hours 30 minutes.
How much does the tour cost?
The price is $99.95 per person.
Does the tour include hotel pickup in Waikiki?
Yes. Pickup is offered from select Waikiki hotels, and you’ll be asked to confirm your pickup location.
What’s included versus not included?
Included: a photographer guide and driver, pickup and drop-off at select hotels, and air-conditioned minivan transport. Not included: food and drinks.
Is the tour affected by rain?
It operates rain or shine, so you should dress appropriately for changing conditions.
How many people are on the tour?
The tour has a maximum of 7 travelers and is described as a small-group experience.