REVIEW · CIRCLE ISLAND TOURS
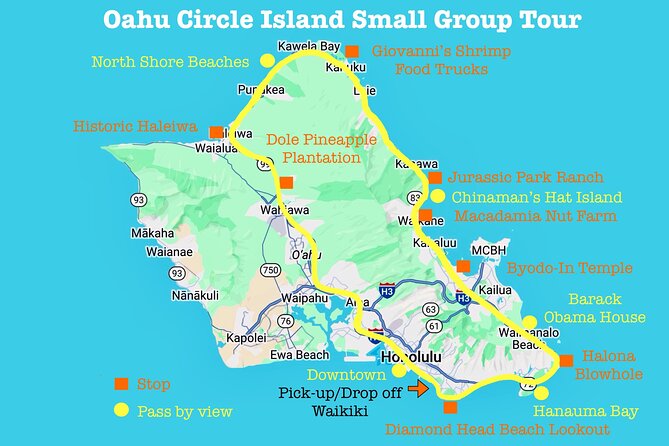
Oahu Circle Island Small Group Tour
Book on Viator →Operated by Hawaii Outdoor Guides · Bookable on Viator
Ready for Oahu in one day? This small-group circle island tour strings together the island’s must-see sights with a guide who keeps the driving simple and the story line clear. You get iconic stops like Diamond Head, Hanauma Bay, Halona Blowhole, and the North Shore, then finish with a classic island-food rhythm.
I especially like how the day mixes famous viewpoints with place-based context. Standing at places like Diamond Head and Halona Blowhole is cool, but the guide’s explanations make it feel connected, not random.
One thing to keep in mind: this is a highlight route with lots of short stops. If you like slow travel or long wandering time, you’ll feel the schedule’s pace.
In This Review
- Key Points at a Glance
- How This Oahu Circle Island Tour Really Feels
- Getting from Waikiki Without Stress
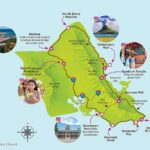
- Stop-by-Stop: What You’ll See and Why It Matters
- Diamond Head State Monument (Pass By)
- Hanauma Bay Nature Preserve (Pass By)
- Halona Blowhole (Quick Stop)
- Rabbit Island (Mānana) (Pass By)
- Waimanalo (Pass By)
- Byodo-In Temple Hawaii (Short Visit)
- Tropical Farms: Macadamia Nut Farm Outlet (Short Stop)
- Kualoa Regional Park: “Secret Beach” (Photo Stop)
- Kualoa Ranch (Short Visit)
- Giovanni’s Shrimp Truck (Lunch Stop)
- North Shore Views: Sunset Beach Park and Waimea Bay (Pass By)
- Haleiwa Store Lots: Shave Ice + Local Town Time
- Dole Plantation (Short Visit)
- Closing Views: Honolulu and Waikiki Beach (Pass By)
- Value for $129: When This Tour Makes Sense
- Best Fit: Who Will Love This Day the Most
- Small Things to Know Before You Go
- Should You Book This Oahu Circle Island Small-Group Tour?
- FAQ
- What’s the duration of the Oahu Circle Island Small Group Tour?
- Is pickup included, and where does it start?
- How big is the group?
- Are tickets or admissions included for the stops?
- What food is provided during the tour?
- Is Hanauma Bay overlook access available?
Key Points at a Glance
- Max 14 guests means you’re not fighting for space or fighting for attention
- Waikiki hotel pickup and drop-off saves you from rental-car stress on day one
- Diamond Head + Hanauma Bay + Halona Blowhole hits the east and southeast icons early
- North Shore photo stops and Haleiwa time balance scenery with local-town energy
- Giovanni’s Shrimp Truck + shave ice gives you that Oahu food-day rhythm without overthinking
How This Oahu Circle Island Tour Really Feels

At 7:30am, you start early enough to beat some crowds and still come home with daylight. The day runs about 9 hours, and the itinerary is built for a single goal: you see the island’s headline highlights without you needing to plan the route, navigate traffic, or babysit the clock.
The small-group size (up to 14) matters more than it sounds. It helps with the flow on busy viewpoints and makes live commentary feel personal instead of shouted over a crowd. And since pickup and drop-off are included from Waikiki, you’re not spending your morning figuring out where to park or how to catch a bus at the right hour.
If you care about Hawaiian history and local context, you’ll get plenty of that. The guide style seems to be a big part of the satisfaction here, too, with names like Dominik/Dominic and Katie showing up in feedback. With a good guide, the tour stops stop feeling like checkboxes and start feeling like a guided story.
You can also read our reviews of more tours and experiences in Honolulu.


Getting from Waikiki Without Stress
This tour includes round-trip pickup and drop-off from Waikiki hotels, which is a big deal on Oahu. Traffic can turn “easy driving” into an unpredictable mess. Here, someone else handles the route and timing, and you focus on looking out the window and snapping photos.
Expect transfers to vary by time of day and traffic. The tour also operates in all weather conditions and asks you to dress appropriately, so bring a light layer and something for rain just in case. You’ll also want to plan for the fact that the itinerary can change. That’s not unusual in Hawaii—weather, volcanic activity, holidays, presidential visits, and transit issues can all affect timing—so I recommend going in with a flexible mindset.
Stop-by-Stop: What You’ll See and Why It Matters
Diamond Head State Monument (Pass By)
Diamond Head is one of those places you recognize instantly, even if you’ve only seen it in photos. Geologically, it’s tied to a volcanic eruption that formed the crater, and your guide explains what you’re looking at as you pass by.
Why it’s worth it: you get the iconic Waikiki-meets-volcano view early in the day. It sets the tone for the rest of the route: Oahu’s beauty is tied to its geologic history. The downside? Since this is a pass-by stop, you’re not doing a full hike here. If you want to climb, you’ll likely need separate time.
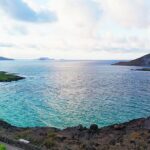
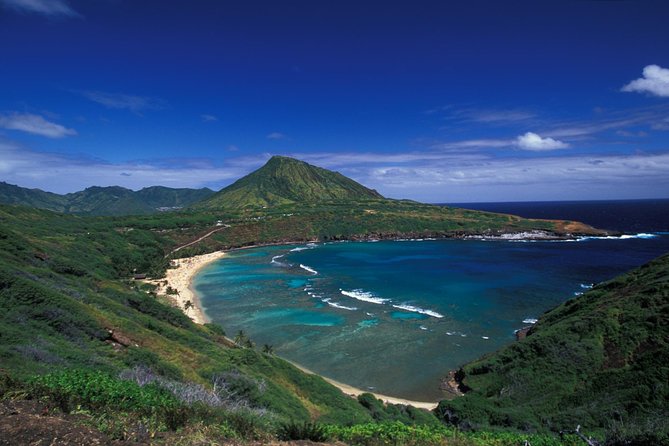
Hanauma Bay Nature Preserve (Pass By)
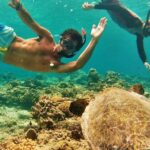
Hanauma Bay is one of Oahu’s most famous bays, especially for snorkeling. You’ll get the science and story behind the bay—coral reef, environmental impact, and the bay’s formation.
Important practical note: the Hanauma Bay overlook is closed for all tours due to COVID. That means your photo time is likely from the accessible viewpoint areas rather than the closed overlook. You still get the picture moment, but you shouldn’t count on being able to wander and linger like you might on your own.


Halona Blowhole (Quick Stop)
At Halona Blowhole, water can shoot up dramatically—up to about 30 feet. The mechanism comes down to small coastal caves and an opening that lets waves push water upward, creating that famous burst.
This stop is short, but it’s a solid “see it, feel it” moment. One weather consideration: blowhole activity depends on ocean conditions, so the day’s swell can affect how dramatic it looks. Either way, it’s a memorable coastal stop.
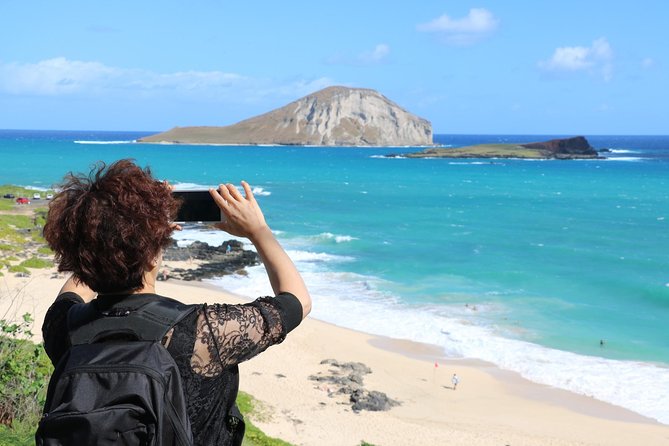
Rabbit Island (Mānana) (Pass By)
Rabbit Island, or Mānana, sits off the windward coast. Your guide gives the history of this little island and points you toward the views.
This is more of a photo-and-facts stop than a walk-around. If you like quick picture opportunities with context, it fits the day well. If you’re the kind of person who wants to stretch legs every time you stop, you may find this one too brief.
Waimanalo (Pass By)
Waimanalo Beach is one of the quieter-looking stretches compared to the busiest areas near Waikiki. You also get a glimpse of a notable oceanfront home associated with Barack Obama along Waimanalo.
Again, this is pass-by viewing. The value here is the scenery and the guide’s commentary, not time on foot.
Byodo-In Temple Hawaii (Short Visit)
Byodo-In Temple is a movie-and-TV recognizable spot, and your stop here is about appreciation and photos. You’ll have around 20 minutes, and admission is included.
Why it works on this tour: it’s a cultural pause after coastal and volcanic views. It also offers strong photo backdrops without feeling like a long detour.
Tropical Farms: Macadamia Nut Farm Outlet (Short Stop)
This is a quick hands-on food stop. You’ll get the chance to crack open a macadamia nut to sample the raw nut. There are also macadamia samples, Kona coffee samples, and a gift shop.
This is a great fit for the tour’s pace because it gives you something tangible to do in a short time. The only drawback is that it’s brief (about 15 minutes), so if you want to shop deeply, plan to do that later on your own.
Kualoa Regional Park: “Secret Beach” (Photo Stop)
You’ll pull up at Kualoa Beach, often referred to as “Secret Beach,” and the guide shows you the protected beach for pictures of Chinaman’s Hat (Mokoli‘i) and Kualoa Ranch. There’s time to walk along the beach for a photo.
This stop seems designed for the photo seekers and the movie/location fans. Keep your expectations realistic: it’s not a long hike. It’s a focused look, and then you move on.
Kualoa Ranch (Short Visit)
Kualoa Ranch spans three valleys: Kaʻaʻawa Valley, Kualoa Valley, and Hakipuʻu Valley. You’ll get about 15 minutes here, including time for a petting zoo and some picture-taking.
Why it’s a good inclusion: it adds a ranch-and-landscape vibe to the day that isn’t just beach and blowhole. The time is tight, though. If you want longer ranch activities, you’ll need extra time beyond this tour.
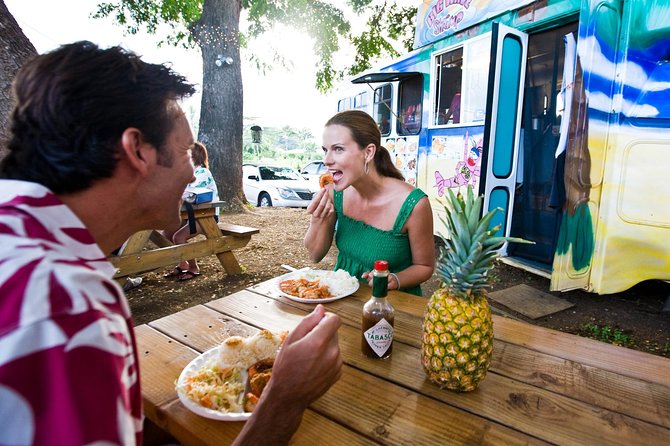
Giovanni’s Shrimp Truck (Lunch Stop)
Lunch is one of the most practical wins on this itinerary. You’ll stop at Giovanni’s Shrimp Truck for a plate lunch, with shrimp as the headline (other options are also available). The stop is about 1 hour, and admission is free.
This is where the tour earns value for people who don’t want to hunt for food between scenic stops. It’s also a classic North Shore-style meal moment that fits the day’s rhythm.
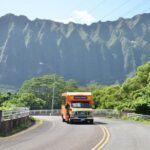
North Shore Views: Sunset Beach Park and Waimea Bay (Pass By)
As you head up the North Shore, you get pass-by views of major surf areas like Sunset Beach Park and Waimea Bay. Both are known for their dramatic coastal scenery, especially in winter months when surf conditions can be huge.
These pass-by moments are exactly what they sound like: you enjoy the views from the road with guidance. You won’t get long beach time here, but it’s an efficient way to see why the North Shore is famous.
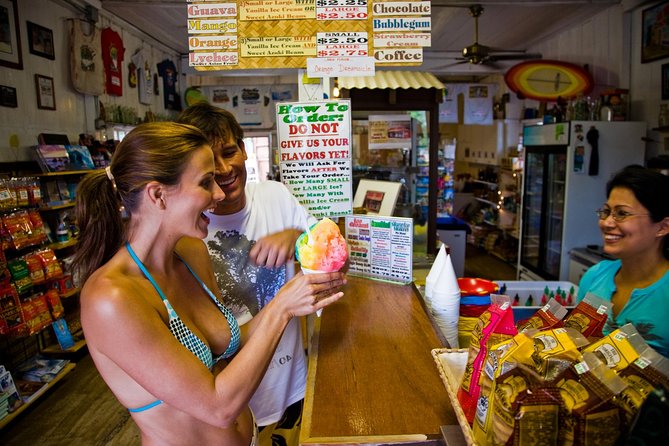
Haleiwa Store Lots: Shave Ice + Local Town Time
Haleiwa is the North Shore town stop where you get a little breathing room. You’ll spend about 30 minutes shopping, eating, and getting shave ice.
You’ll likely want to make time for Matsumoto’s Shaved ice, which is called out as an island classic. This stop is small-town Hawaii energy in a condensed package. The main limitation is the half-hour time window, so choose priorities: shave ice, a few snacks, and a quick browse.
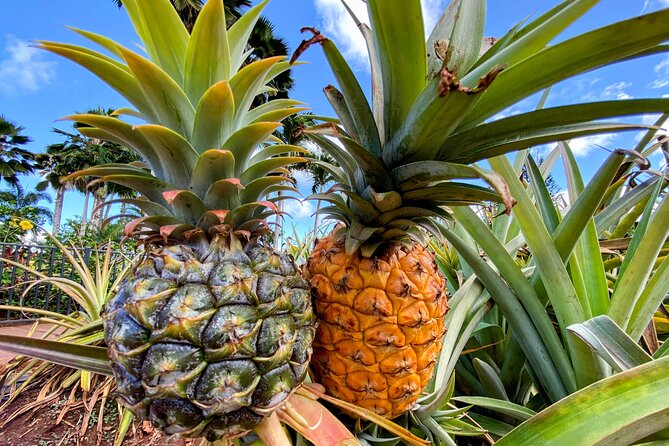
Dole Plantation (Short Visit)
The Dole Plantation stop includes time to see pineapple plants, how pineapples are cut, and information about how chocolate is grown and harvested. You’ll also get the Dole Whip treat.
This is a fun, easy final “touristy but worth it” stop. It’s not pretending to be an off-the-grid farm experience; it’s more like a family-friendly, packaged learning moment with tastings. That said, it’s still enjoyable, and it gives you something sweet to close the day.
Closing Views: Honolulu and Waikiki Beach (Pass By)
After the plantation, you circle back with coastal and mountain views around Honolulu and then pass Waikiki Beach. It’s a visual wrap-up: you start near Waikiki and end near it, which helps it all feel connected.
If you’re hoping for a sunset moment here, don’t count on it. This tour ends with pass-by viewing, not a timed sunset stop.
Value for $129: When This Tour Makes Sense
At $129 per person, the value depends on what you’d otherwise spend and how you’d otherwise structure your day.
You’re paying for:
- A live guide with commentary
- Small-group format (max 14)
- Waikiki pickup and drop-off
- Included taxes and fees
You’re not paying for:
- Food and drinks (though lunch is provided via the shrimp truck stop)
- Pearl Harbor
If you’re staying in Waikiki and you don’t want to rent a car (or you don’t want to do the driving yourself), this price starts looking fair fast. You also avoid the “lost time” tax of navigating traffic and finding parking while trying to fit in several major landmarks.
If you do have your own car and you love self-driving, you could probably visit many of these stops on your own. But the tradeoff is that you’d still be timing it, and you’d lose the guided explanations that seem to be one of the biggest satisfaction drivers here.
Best Fit: Who Will Love This Day the Most
This tour is a great match if you:
- Want an Oahu overview without spending time planning the route
- Like history and context, not just photo stops
- Prefer a small group (max 14) over a big bus feel
- Want an easy food day with lunch and shave ice built in
It’s less ideal if you:
- Want long stretches of free time at every sight
- Don’t like “see it, then move on” pacing
- Want to skip tourist stops entirely (Byodo-In Temple and Dole Plantation are part of the plan)
Small Things to Know Before You Go
- Hanauma Bay access is affected: the overlook is closed for all tours, so plan on photo opportunities from accessible areas.
- Stops can shift: weather, traffic, holidays, and other events can alter timing. Your guide will offer the best available alternatives.
- Photo times vary: several stops are pass-by or short. If photography is your priority, bring a phone strap or a small bag for quick movement.
- Dress for real weather: the tour runs in all weather conditions, so a light rain layer is smart.
Should You Book This Oahu Circle Island Small-Group Tour?
If you want the fastest path to Oahu’s headline sights—Diamond Head, Hanauma Bay, Halona Blowhole, the North Shore, Haleiwa, and Dole—while avoiding rental-car logistics, I think this is a strong pick. The small-group size and guided storytelling seem to be the reason people feel the day is worth it, not just packed.
I’d only skip it if you know you’ll get frustrated by short photo stops and limited linger time. If you’re okay with a packed highlights day and you want an organized way to see a lot of the island, book it and enjoy the ride.
FAQ

What’s the duration of the Oahu Circle Island Small Group Tour?
The tour runs about 9 hours, with transfer times that can vary depending on the time of day and traffic conditions.
Is pickup included, and where does it start?
Yes, the tour includes Waikiki hotel pickup and drop-off. The start time is 7:30am.
How big is the group?
The maximum group size is 14 guests.
Are tickets or admissions included for the stops?
Some admissions are included (for example, Byodo-In Temple is included). Other stops are listed as free, and some activities may not include admission for specific experiences. Food and drinks are not included.
What food is provided during the tour?
Food isn’t included as a general category, but there is a lunch stop at Giovanni’s Shrimp Truck where you can try shrimp plate lunch options. You’ll also have time for shave ice in Haleiwa.
Is Hanauma Bay overlook access available?
No. The Hanauma Bay overlook is closed for all tours due to COVID, though you still pass by and have the chance to view and take pictures from accessible areas.