REVIEW · PHOTOGRAPHY SESSIONS
Oahu Island Photography Tour
Book on Viator →Operated by Blue Hawaii Photo Tours · Bookable on Viator
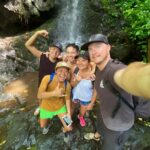
A camera changes how you see Oahu. This full-day photo tour blends pro shooting tips with real island scenery from Waikiki to the North Shore, plus you might actually spot sea turtles and monk seals along the way. I especially love how the guides make the technical stuff practical, like working with light and deciding on shutter speed, framing, and focus—then you use it right away. I also love that it’s small, so you get hands-on help without feeling rushed. One drawback: you’ll need to bring your own camera or smartphone, and lunch is on your dime.
If you’re staying in Waikiki, this is a simple way to get out and back without playing logistics roulette. The tour runs about 8.5 hours with hotel pickup/drop-off, and the guides (often named Jenny, Evan, Marie, Pattie, or Jason in past tours) are known for connecting photography coaching with Oahu geography and history. With a max group size of 6, the day stays relaxed, even when the weather is moody.
In This Review
- Key things that make this Oahu photo tour worth your time
- Oahu From Waikiki, With Pro Photo Coaching Built Into the Day
- The 8-Hour Route: From Volcanic Coasts to North Shore Surf-Spot Photography
- Light, Framing, Shutter Speed, and Focal Points You Can Use Immediately
- Tripods Included: Why This Small Detail Makes a Big Difference
- Phones, DSLRs, and Set-Up Help Without Feeling Overwhelmed
- Lunch on the North Shore, Plus the Food-Stop Bonus Mood
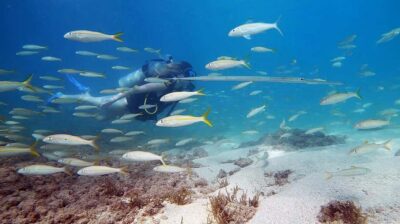
- Oahu Wildlife Moments: How to Spot Turtles and Seals With Better Awareness
- Price and Value: What $150 Buys You in Real Shooting Time
- Who This Oahu Photo Tour Is Best For (and Who Might Want a Different Day)
- Should You Book This Oahu Photo Tour?
- FAQ
- What’s the duration of the Oahu photography tour?
- Is hotel pickup and drop-off included?
- How large is the group?
- Do I need my own camera or smartphone?
- Are tripods included?
- Is lunch included?
- What kind of photography help do I get?
- Will the tour visit the North Shore?
- What wildlife might I see?
- What happens if weather is bad?
Key things that make this Oahu photo tour worth your time
- Small group size (up to 6) means you can ask questions and get set-up help without waiting your turn
- Tripods included, which matters for night shots, waterfalls, and low-light beach scenes
- North Shore surf-area stops, including winter big-wave conditions when available
- Instruction for phones and cameras, so you’re not stuck with one “type” of photographer
- Wildlife spotting mindset, including Hawaiian monk seals and green sea turtles
- Guides who mix photo technique with local context, so your pictures come with meaning
Oahu From Waikiki, With Pro Photo Coaching Built Into the Day
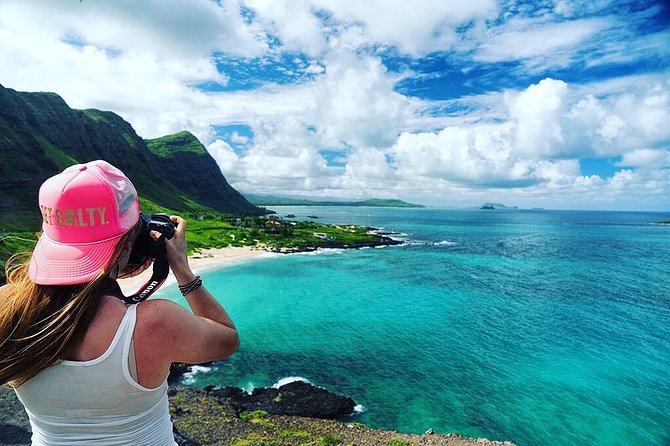
This tour is built for one thing: getting better images in a single, active day. You start in Waikiki with an air-conditioned van pickup, then you’re off to a sequence of photo-friendly settings where you can test what you just learned. Even if you’ve shot on manual or you only use your phone, you’ll get guidance that’s tied to what you’re looking at, not generic camera theory.
What I like most is the tone. It’s not a stiff classroom. Your guide points out details you’d normally walk past—how light changes by the hour, why certain angles make the scene feel deeper, and how to frame a subject so it doesn’t look like a postcard screenshot. And because it’s small-group, you’re more likely to get quick troubleshooting on the spot.
Guides often combine photography instruction with island context, which is why so many people mention the names Jenny, Evan, and Marie. The best part of that approach is that it helps you predict what you might want in your next shot—like where the light will land or why a spot is framed the way it is.
You can also read our reviews of more photography tours in Honolulu
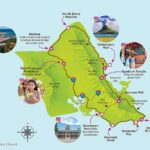
The 8-Hour Route: From Volcanic Coasts to North Shore Surf-Spot Photography
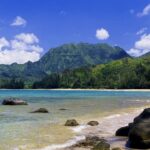
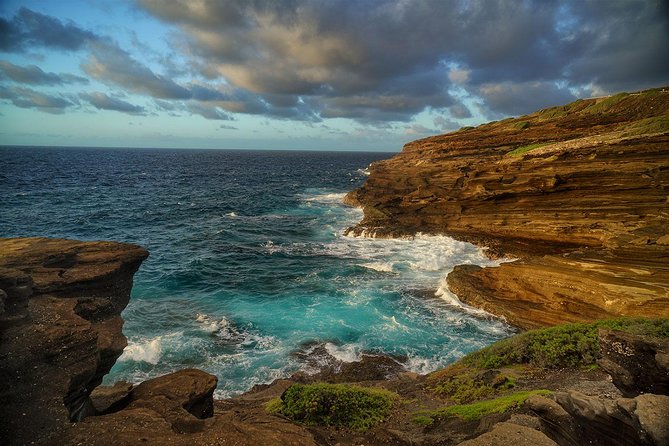
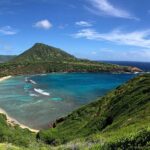
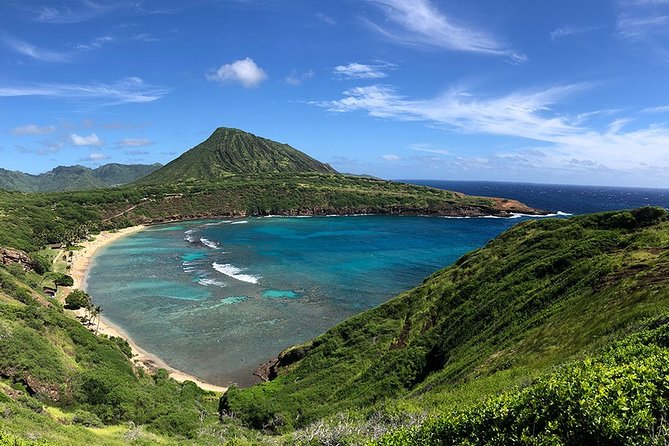
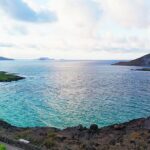
Oahu is packed with visual “zones,” and this tour uses that. The exact locations vary by day and season, but you can expect a broad sweep: coastal vistas, lush rainforest-style scenery, sacred Hawaiian sites (heiaus), and dramatic valleys. In winter, you may get winter-surf beach energy, with big waves and surfers showing up where you can photograph motion.
On the North Shore, the focus turns from simple scenic portraits to action and texture. That’s where camera settings matter. When surfers are in play, your guide can help you think about motion blur versus freezing action, and how to keep your subject sharp while the background stays pleasing.
The day is also paced like a real photography outing, not a speed-run. You drive between spots, stop for setups, and keep moving when the light shifts. In past tours, weather has been part of the story too—clouds in the morning don’t automatically ruin the day. You’ll still get to practice and shoot, and the guide’s job becomes finding the best angles under different light.
Light, Framing, Shutter Speed, and Focal Points You Can Use Immediately
This tour is worth it because it teaches camera thinking in the real world. You’ll get pointers on how to use light and what different camera choices mean for the final image. The guidance often includes practical terms like shutter speed, framing choices, and focus points—then you apply them at a scenic stop minutes later.
For beginners, the payoff is quick confidence. You learn what settings change in a photo, and you stop guessing. For more advanced shooters, the value is that the guide is watching what you’re trying to capture and suggesting adjustments to get closer to the look you want.
One reason people leave happy is that the instruction covers multiple devices. The tour is suitable for all skill levels, including those shooting with smartphones. That matters because phone cameras can be surprisingly capable once you know what to look for—like how to set focus, handle contrast, and avoid blown highlights when the sun is strong.
I’d also plan to ask questions as you go. The tour is built around the assumption you’ll want advice while you’re standing there with a subject in front of you, not after you get back to your hotel.
Tripods Included: Why This Small Detail Makes a Big Difference
A lot of tours mention “photo tips,” but fewer give you what you need to actually execute. Here, tripods are included, and that changes what you can realistically shoot.
Tripods help with:
- Long exposures (useful for smoothing water, showing motion in surf, or balancing bright scenes)
- Low-light scenes where shutter speed would otherwise be too slow
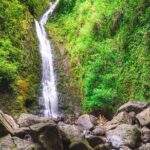
- Waterfalls or misty angles where you want stability and consistent framing
Even if you’re using a phone, stability can still help. Your guide can help you set up so your shot isn’t fighting hand shake. And if you’re using a DSLR or mirrorless camera, the tripod is what allows you to practice shutter speed and focus decisions without losing sharpness.
Because the day includes multiple kinds of locations—coastlines, valleys, and sacred sites—the tripod gives you flexibility. You don’t have to rely only on perfect midday sun. You can work with what the island gives you.
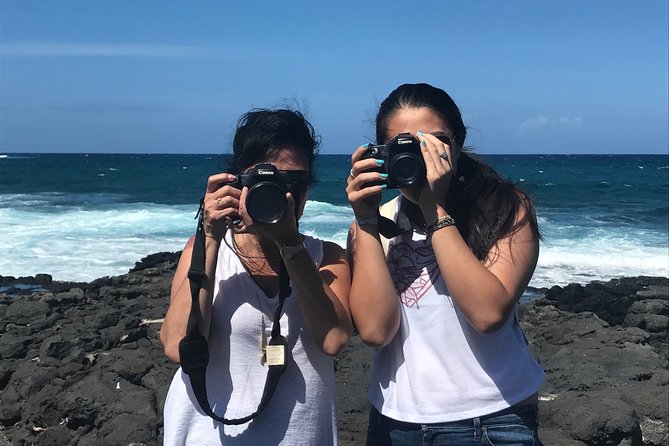
Phones, DSLRs, and Set-Up Help Without Feeling Overwhelmed
This is one of the most “everyone can join” styles of photo tour. The day is set up so that beginners can learn the basics while more experienced photographers refine their approach.
Here’s the practical part: your guide can work with you based on what you’re using. You might be shooting:
- A smartphone with camera settings you weren’t using before
- A dedicated camera with manual modes or semi-auto options
- Anything in between
In past tours, people specifically praised phone photography tips, which is a good sign if you want better results without switching systems. If you’re brand new, you’ll likely get help on what mode to use, how to set focus, and what to watch for in composition. If you’re experienced, you can focus on refining timing—like when to shoot for cleaner backgrounds during action scenes.
One caution: not every minute is a deep technical workshop. This is a guided island day with photo coaching. If you’re expecting an intensely structured class where you master every setting step-by-step, plan for the coaching to be practical and situational.


Lunch on the North Shore, Plus the Food-Stop Bonus Mood
Lunch is not included, but you do get a break around halfway through the day. It’s typically on the North Shore, which is perfect because it breaks up the long drive and sets you up for the afternoon’s surf photography.
And yes, food matters here. In one tour experience, there was an extra stop connected to a coffee roasting facility for an afternoon snack. You shouldn’t count on it every time, but it reflects the general vibe: the day is trying to give you more than just driving and snapping.
If you want to keep your energy up for late-day shots, eat something that doesn’t slow you down. Bring water, and consider a light snack plan so you can get back to shooting without feeling like your battery is toast.
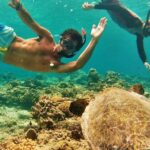
Oahu Wildlife Moments: How to Spot Turtles and Seals With Better Awareness
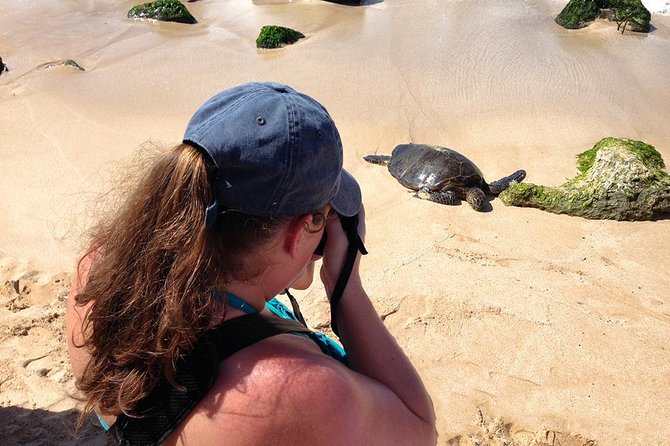
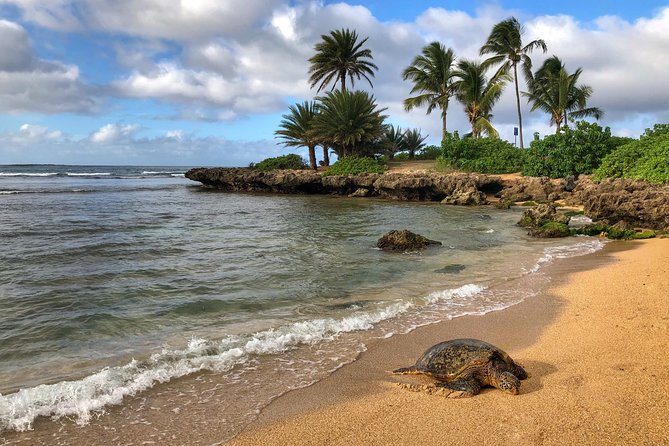
One of the best things about this tour format is the “look, then shoot” mindset. You’re guided to areas where wildlife may appear, including Hawaiian monk seals and green sea turtles. While spotting animals is never guaranteed, the tour’s focus helps you watch rather than just pass by.
For wildlife photography, the biggest win is patience plus the right setup. Tripods help with stability, but the real trick is timing: being ready when something shifts. Your guide can help you think about where to stand, how to frame from a safe distance, and how to keep your composition from getting chaotic when the scene moves.
If you’re lucky enough to see sea turtles on a beach, the goal becomes photographing without crowding or rushing. You’re there for respect and good framing, not selfies at all costs.
Price and Value: What $150 Buys You in Real Shooting Time

At $150 per person, this isn’t a bargain bus tour. It’s priced like a guided workshop day, and the value comes from three things you can feel immediately:
- Hotel pickup/drop-off from Waikiki saves time and hassle
- A professional photography guide who teaches shooting choices tied to actual stops
- Tripods included, so you’re not paying extra or compromising your shot planning
You also get a small-group experience (maximum 6), which matters because time with your guide is part of what you’re paying for. Larger groups usually turn photo coaching into “good luck” advice shouted across a parking lot. Here, the day stays more personal.
What costs extra: lunch is on your own, and you must bring your own camera or smartphone. If you’re prepared for those two items, the price feels reasonable for the instruction plus the full-day island access.
Who This Oahu Photo Tour Is Best For (and Who Might Want a Different Day)
This tour fits you if you:
- Want to improve photos quickly without messing around with guesswork
- Like hands-on guidance while you shoot
- Have a phone or camera and want tips that apply to both
- Appreciate Oahu scenery and want it with local context
It’s also a smart first-tour choice when you’re early in your Oahu trip. Learning where to stand, how to frame, and how to anticipate light can make the rest of your vacation photography better.
You might consider a different option if:
- You want a pure sightseeing day with minimal instruction
- You prefer a slow, in-depth workshop where every setting is taught step-by-step
- You don’t want to carry your own camera/gear and troubleshoot settings
One more practical note: wear comfortable, closed-toed walking shoes and bring sunscreen and a hat. This is active, and you’ll be out and moving between stops.
Should You Book This Oahu Photo Tour?
I think you should book this if you want a focused day that mixes serious photo help with an easy way to tour Oahu from Waikiki. The small group size, tripod inclusion, and on-location coaching are the combo that makes it work. If you like photographing the beach, surf, waterfalls, and sacred sites—and you want to understand how to set up your camera to match the scene—you’ll get your money’s worth in a way that’s hard to replicate on your own.
FAQ
What’s the duration of the Oahu photography tour?
The tour runs about 8.5 hours (listed as 8 hours approx. in the summary).
Is hotel pickup and drop-off included?
Yes. Pickup and drop-off are included, and pickup is offered from Waikiki area hotels.
How large is the group?
It’s a small group with a maximum of 6 travelers.
Do I need my own camera or smartphone?
Yes. Participants are required to bring their own camera or smart phone.
Are tripods included?
Yes. Tripods are included.
Is lunch included?
No. Lunch is not included, and you’ll have a break for lunch (own expense).
What kind of photography help do I get?
You’ll learn how to use light and understand framing, shutter speed, focal points, and other composition basics, with tips aimed at beginners through advanced photographers.
Will the tour visit the North Shore?
Yes. The route includes stops at the famous winter surf beaches on the North Shore, with winter big-wave conditions possible depending on the season.
What wildlife might I see?
The tour mentions opportunities to look for Hawaiian monk seals and green sea turtles, depending on conditions and where you stop.
What happens if weather is bad?
The tour operates in all weather conditions, and it requires good weather. If it’s canceled due to poor weather, you’ll be offered a different date or a full refund.